Unlock the Potential of Self-Publishing with Kindle Direct Publishing
One sunny day, my bestie and I were out for a coffee, and we found ourselves chatting about Amazon KDP (Kindle Direct Publishing) before we had really explored it. We were both curious about how to create a book to self-publish on Amazon KDP.
You know the saying, “You don’t know what you don’t know until you know”?
Well, that’s where we were!
After doing some research, we discovered that creating a book for Amazon KDP is actually quite simple. You just need to follow two steps:
Step 1: Create or buy an interior for your book
You can create an interior for your book using a design program or purchase one from an online marketplace.
Step 2: Design or buy a high-quality front and back cover
Design an eye-catching and professional-looking front and back cover for your book, considering bleed or no bleed options using a design program of your choice. (I use Canva) or Hire a freelancer of questionable quality from Fiverr or Upwork.
Notice I said it was simple, I did not say it was easy.
But I stuck to it. On the date of this post, I have over 115 books selling (some of them very well) on the Amazon KDP Marketplace.

With that in mind, let’s dive deeper into the process!
Step 1: Creating the Interior
When creating a book, you need to decide what type of content you want. You can start with low or no-content book interiors, like logbooks or daily planners, and eventually move on to higher-content books like activity books or game-themed books.
For this example, we’ll create a 120-page lined writing journal with a flower theme.
Where to Start?
First, you’ll need to prepare the interior of your book. To do this, you need to know the size of the book and the number of pages it will be. In our case, we’ll use a 7-inch by 10-inch size, which is slightly bigger than an average journal or composition notebook, and for this example, I chose that size because that the size I like the best. Since we’re creating a 120-page journal, we’ll need a template that meets Amazon KDP requirements. You can use the book-size calculator in KDP or visitwww.bookow.com for free and easy-to-use templates. Detailed Instructions to use Bookow.com are in Step 2, below.
Sizing the interior takes a bit of understanding, I’ve tried to help you with that above. Remember, a 7 X 10 interior is actually 7.125 X 10.25
Because the lines in my notebook will run past the edge of the page giving it a side-to-side look it will need to be sized for bleed. My interior file should be 0.125 inches larger in width and 0.25 inches larger in height.
So 7.125 X 10.25. You can size that in Canva and away you go.
In this example, I’ve used a blank-lined journal interior purchased from Creative Fabrica. With my annual membership, I have full commercial rights to use it. To stay organized and prepared, I always keep a record of the purchase and all relevant information in case I face any copyright infringement issues with KDP. I store this information in a document, along with my interior file, cover file, and any other digital assets related to each project. This proactive approach ensures that all necessary information is readily available, saving time and effort in case any issues arise. If you prioritize maintaining proper documentation and staying organized, you can focus on creating beautiful and successful projects on Amazon KDP with confidence, knowing that you are well-prepared to address any concerns if needed.
Step 2: Mastering the Art of Cover Design for Amazon KDP with Bleed or No Bleed Options
It’s time to get to work designing your masterpiece. Before anything, research the competition on Amazon and then try to improve upon their designs with your own flair. If you aim to master Amazon KDP and self-publish your book in two simple steps, then the cover design is everything, and you should not take this lightly. It is the number one determinate of whether your book will sell. Again, DO NOT OVERLOOK THIS PART. A compelling cover is what sets your book apart from the competition, so it’s time to unleash your creativity.
Let’s focus on designing the cover using a tool like Canva.com.
When designing the cover, consider whether you want a bleed or no bleed option for your 7×10 book with a lined interior and 120 pages.
Bleed: Opting for a bleed means your cover design will extend past the edges of the book, allowing for trimming during the printing process. This ensures that your design covers the entire surface without leaving any white borders.
No Bleed: Conversely, choosing a no-bleed option means your cover design will not extend past the edges of the book. This may leave a white border around your cover if the printing or trimming is not perfectly aligned.
I recommend selecting the BLEED option for a polished and professional appearance.
When I first began my KDP self-publishing journey, determining the correct cover size was a baffling task. I spent hours trying to decipher the right dimensions, and even now, I occasionally need to consult my notes to ensure I have the size just right. I often wished for a straightforward explanation of the exact dimensions required for both the interior and exterior. The abundance of numbers on the sizing templates and lack clear language and of the specific terms used in the publishing industry can initially create a great deal of confusion. However, don’t fret; with time and practice, you’ll eventually master the process, just like I did.
More on ‘sizing’ in the next section! Yay!
Instructions to Make Sure Your Cover Meets the KDP Requirements
To create a book cover using bookow.com and Canva, follow these steps:
1. Visit bookow.com and enter the desired size of your book (in this case, 7×10 inches).
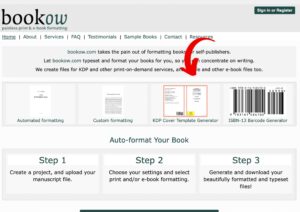
2. Choose the type of paper you’ll be using (it matters).
3. Enter your email address twice.
4. Click the consent button.
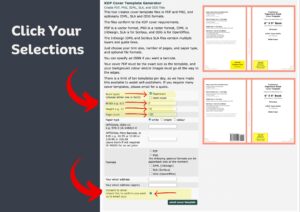
5. On the next page, scroll up and click “maybe next time.”
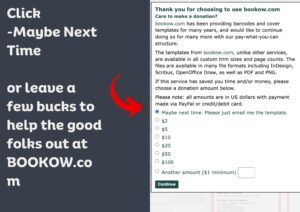
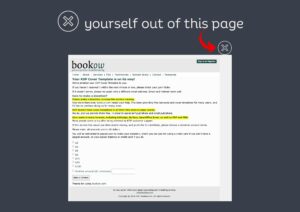
6. On the last prompt, close the window.
Now, let’s move to your email and Canva:
Start designing your masterpiece by researching the competition on Amazon and trying to improve upon their designs with your own flair. Once you are ready to go follow the steps below.
1. Open your email application and download the PNG file bookow.com sent you.
2. Go to Canva and create a new project with the desired size of your book cover (7×10 inches in this case, bus since you will be designing both the front and back on the same page, I always double the width, so I would start the file at 14 X10)
3. Click on the “Uploads” tab and upload the PNG file you saved from bookow.com.
4. Insert the image into your new project.
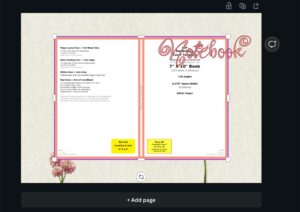
5. Go to “Resize” (top left) and click on it.
6. Type in the Page-Layout Size (Full Bleed Size), which can be found at the top left of the PNG. In this case, the overall cover size (front and back) is 14.520×10.25 inches.
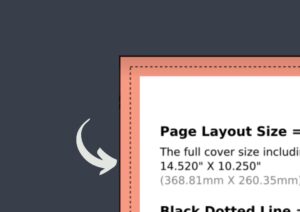
7. Add a second blank page to your project.
8. Start adding in all your design details on the second slide.
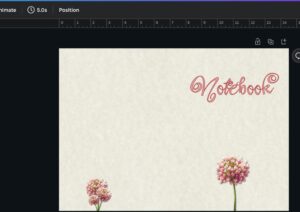
9. Copy the image from slide one and paste it overtop of your design on slide 2.
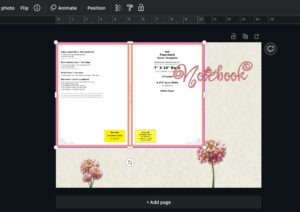
10. Use the corners to stretch the image to size. It will maintain its aspect ratio if you use the corners. If you use the tabs to pull it from the middle, the sizing will change, and you’ll need to start over or undo your last click and drag.
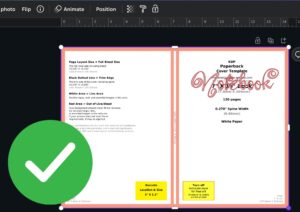
11. Go to “Position,” and send the image to the back. Now you can see any mistakes in your design and fix them.
12. Delete the PNG template and then download your design to your computer as a “PDF Print” file.
Use the same template and do your best to locate the sizing and add-ons to the sizing (e.g., spine, bleed, or no bleed) for the interior sizing.
Once your cover and interior are all set, save both of them as separate files, but both are saved in the ‘PDF print’ format.
Uploading to KDP
With your book interior and cover ready, all that’s left is to upload them to the KDP website. However, that is a whole different topic, so stay tuned for a post about uploading to KDP in the near future.
For now, go ahead and create your first low-content book. Don’t worry too much about perfect niche research at this stage; just go for it, practice, and learn. Chances are, your first few books might not be bestsellers, but that’s okay. If they do gain traction, consider yourself lucky or talented (or both) and keep going!
Next Steps
As you become more familiar with the self-publishing process, you can start researching profitable niches and keywords to target. Remember, proper research is essential before creating any book, so be patient and thorough. There are numerous resources available online to help with keyword research for beginners. You should consider investing in tools and resources such as the one I mainly use, Publisher Rocket. It will help you to streamline your research process and uncover more profitable opportunities. Just take your time and absorb the knowledge.
Once you’ve found the right niche and keywords, continue to refine your design skills and enhance your book interiors. Take courses if you need to on platforms like Udemy or Skillshare. Experiment with different types of content and formats, always keeping an eye on the competition to stay ahead of the curve.
That’s it! You are ready. Get started on the journey to Mastering Amazon KDP by Self-Publishing Your Book in Two Simple Steps, right now!
Creating a book to self-publish on Amazon KDP is a straightforward process involving two main steps: designing the book’s interior and cover. Keep in mind the bleed or no bleed options, as well as the importance of proper niche and keyword research.
Embark on your self-publishing journey with enthusiasm and persistence, and remember that practice makes perfect. The more you learn and create, the better you’ll become at crafting successful books that stand out on Amazon’s virtual shelves.
Happy self-publishing!
*a little humor for your day…*
“Why do self-published authors make great friends? ”
Because they always know how to turn a new page and start a fresh chapter!

